
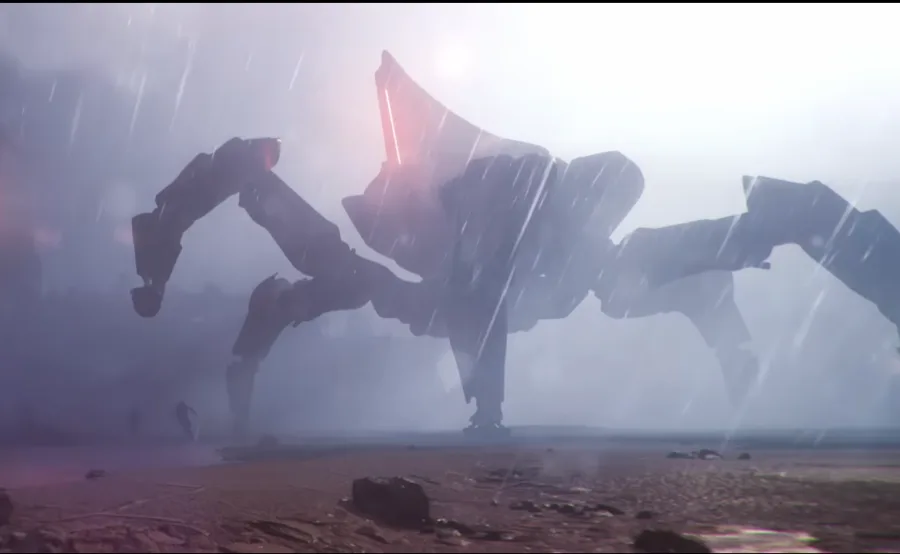
ARC survey
Identify machines, weak points, and salvage.
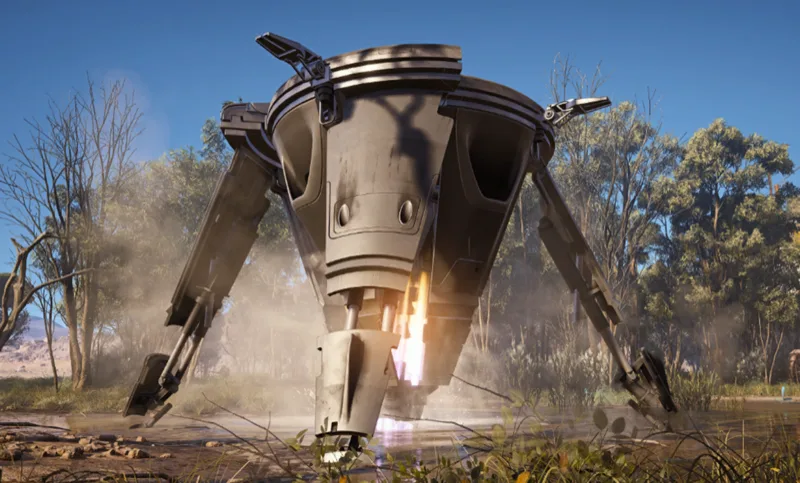
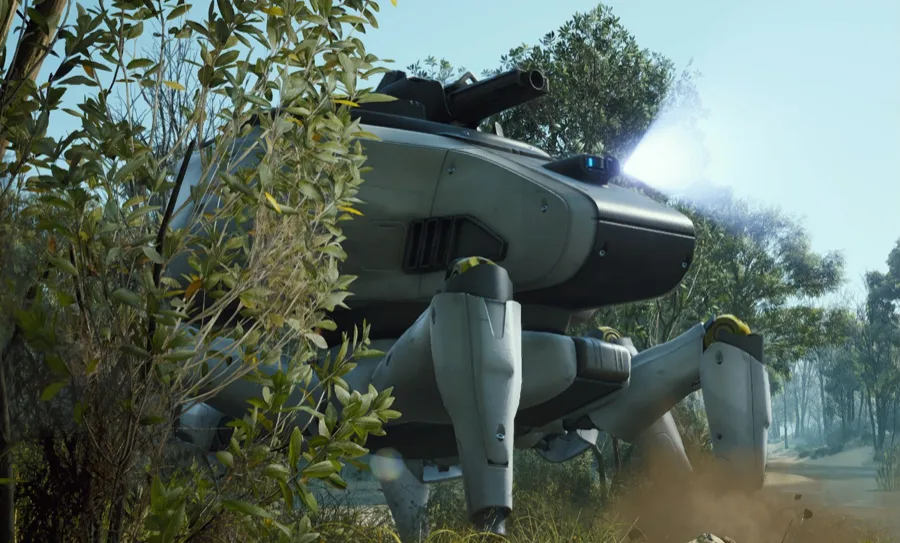
Building the machines
How Embark designed the ARCs — their behavior, their menace, and the AI that hunts the surface. From the official “Evolution of ARC Raiders” series.
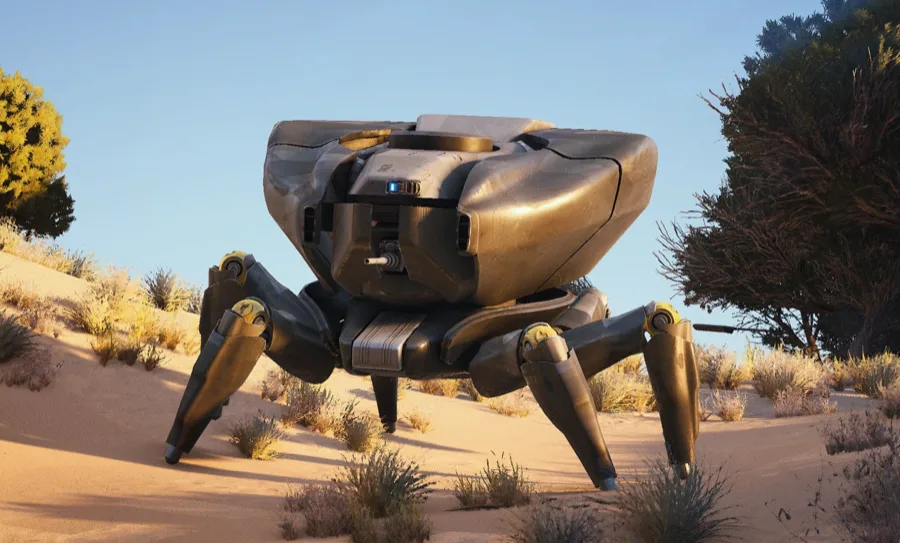
Bastion
A fortress on legs plated in thick armor, believed deployed wherever ARC detects resources worth defending. It walks slowly but its gatling gun tracks fast, so the fight is about breaking line of sight — buildings, foliage, corners — then punishing its stun windows after popping leg joints or the rear canister. It's helpless while stunned by Hornet Drivers or Showstoppers, and Blaze Grenades chip it effectively. Found in wide-open areas on all maps (including east of Water Treatment Control on the Dam, Buried City's Market Ruins, the Spaceport hangars' surroundings, Blue Gate's Outer Gates, and Stella Montis' Loading Bay), usually with a Wasp/Hornet escort. Drops the Bastion Cell for Gear Bench upgrades.
- Health
- 2,050
- Weak points
- 2
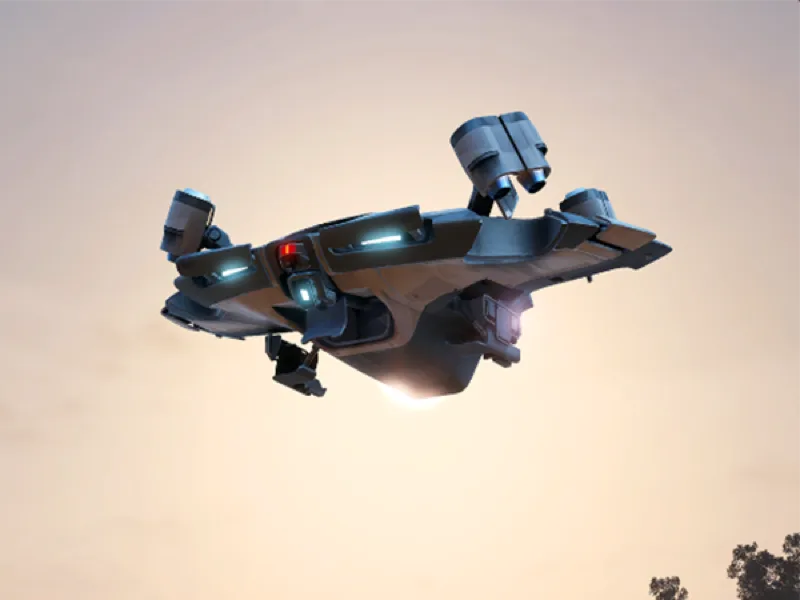
Vaporizer
largeA large flying drone sent on high-importance missions, combining a fire-laying laser with a Matriarch-style energy shield that swallows all projectiles and throwables — including Wolfpacks and Seeker Grenades. The shield has a cooldown after each use, so bait it with a cheap throwable first, then dump seeking or high-damage weapons into the opening. Added in Update 1.22.0 (Flashpoint) and rolled out to more maps and conditions in 1.26.0; Vaporizer/Surveyor scanning parties define the Close Scrutiny ARC Operation condition.
- Health
- 1,500
- Weak points
- 2
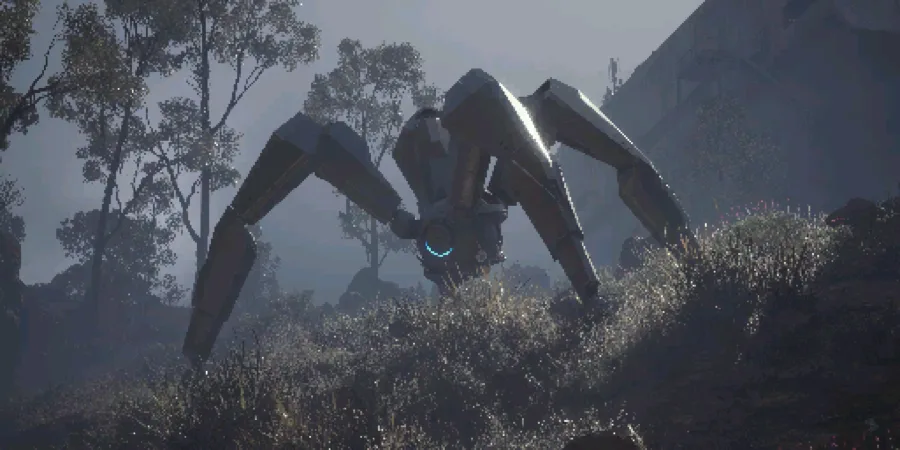
Leaper
An agile four-legged brute guarding high-value objectives, usually patrolling with smaller ARC to create layered threats. Distance and cover mean little against its leap, so use stun and burst damage: cycle Blaze Grenades on it and finish with a couple of heavy ammo shots, stun it with Hornet Drivers/Showstoppers, or shoot its eye and leg joints from behind a doorway it can't fit through. Known haunts include the Dam's Red Lakes area, Buried City's Marano Park and Plaza Rosa, south of the Spaceport Launch Towers, and several Blue Gate clearings. It was called the Bison before the Server Slam test. Drops the Leaper Pulse Unit for Utility Station upgrades.
- Health
- 1,100
- Weak points
- 2
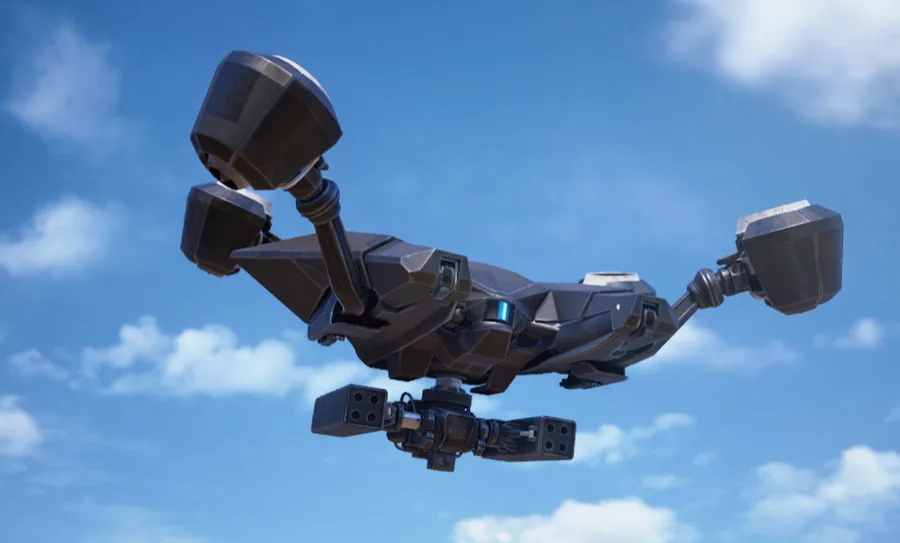
Rocketeer
largeA large flying missile platform deployed over high-value locations. When its targeting laser disappears (full lock), dodge-roll or break line of sight immediately. Fights revolve around cover and thruster damage: a Showstopper to a thruster grounds it for a few seconds, two Wolfpack grenades wreck it, and stunned or ridden Rocketeers can be attacked point-blank (riding one and dealing damage grants the Death From Above achievement — it will backflip to throw you off eventually). Its combat aggro lasts about 20 seconds after losing sight before it de-escalates. Drops the Rocketeer Driver for Explosives Station upgrades.
- Health
- 1,100
- Weak points
- 3
Shredder
A hovering close-quarters brawler that floats just off the ground and hunts raiders through hallways, favoring fights where corners cut off escape routes — it excels in the halls of Stella Montis, though the wiki notes it's no longer exclusive to that map (it also appears in the Spaceport's Hidden Bunker). Explosives timed during or just after its charge-up are highly effective, and luring it over a Jolt Mine in a doorway stuns it for free thruster shots. Never engage without cover. Added in Update 1.2.0 (North Line).
- Health
- 385
- Weak points
- 1
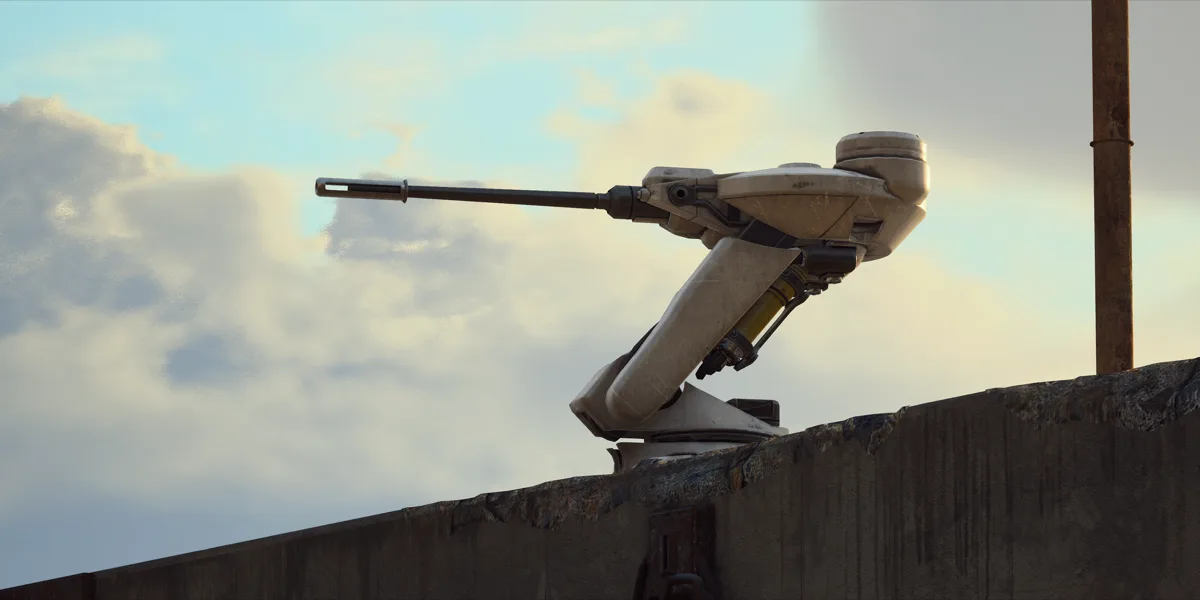
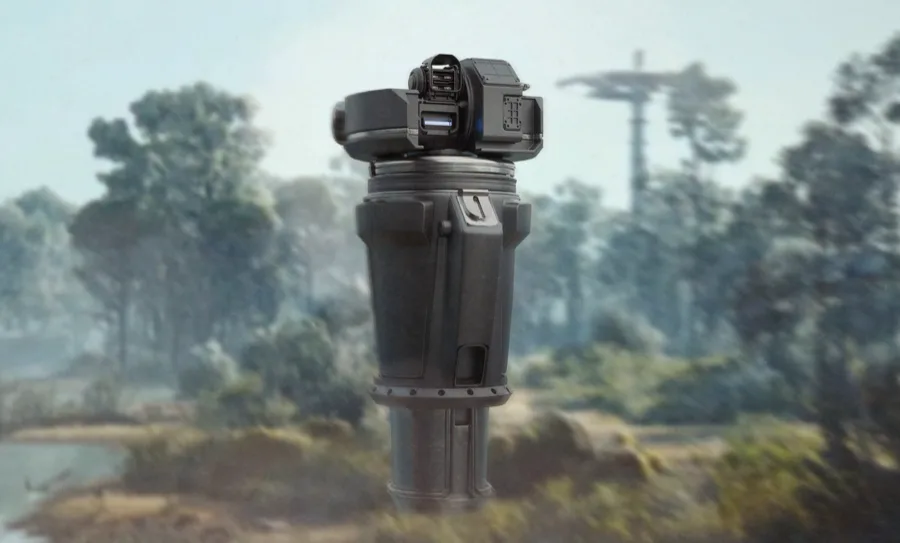
Sentinel
mediumA medium sniper-turret ARC mounted on rooftops, ledges and even ceilings overlooking open ground, appearing most often during Hurricane conditions. Its solid red beam means it's aggroed; four converging yellow beams mean a shot is imminent. Its reach is enormous — distance is not safety — but its reaction time and fire rate are slow, so raiders duel it from solid cover, dodge-rolling or sliding as the lasers converge, and aim for the yellow canister. Perches include the Breach at the Dam, Buried City's Town Hall bell tower, Spaceport's South Trench Tower, the Outer Gates beams at Blue Gate, and the Atrium ceiling on Stella Montis.
- Health
- 300
- Weak points
- 1
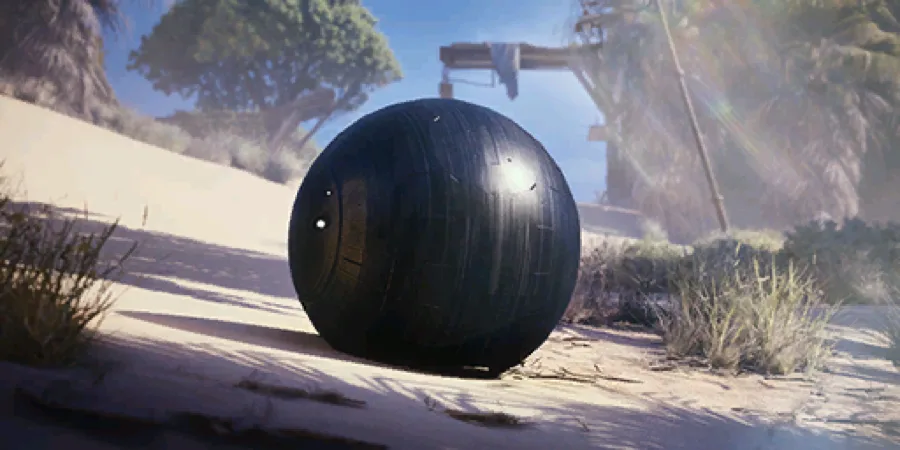
ARC Surveyor
An unarmed rolling sphere that periodically stops to fire a blue communication laser skyward. Its shell opens while it transmits. Threatened, it bolts faster than a sprinting raider (occasionally right off a ledge). Stun it with a Hornet Driver or Showstopper so it can't flee or close its shell, then hit it with heavy explosives; heavy ammo strips its lootable armor panels best. Its Surveyor Vault drop upgrades the Medical Lab. Groups of Surveyors headline the Close Scrutiny map condition alongside Vaporizers.
- Health
- 257
- Weak points
- 1
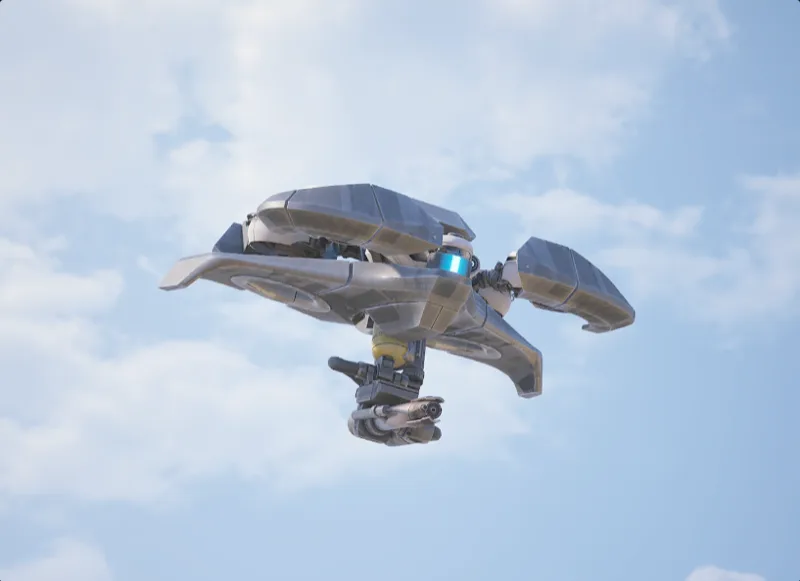
Firefly
A heavily armored flying drone that gives Wasp and Hornet patrols close-range fire support. Entering combat, it extends its flamethrower — exposing the yellow fuel tank that is its real weakness — then chases targets down to burn them. Like other ARC drones it falls out of the sky once enough thrusters are gone, and it torches the ground when it dies. Added in Update 1.17.0 (Shrouded Sky); Update 1.26.0 heavily reduced its presence on Dam Battlegrounds to keep beginner sessions manageable.
- Health
- 200
- Weak points
- 2
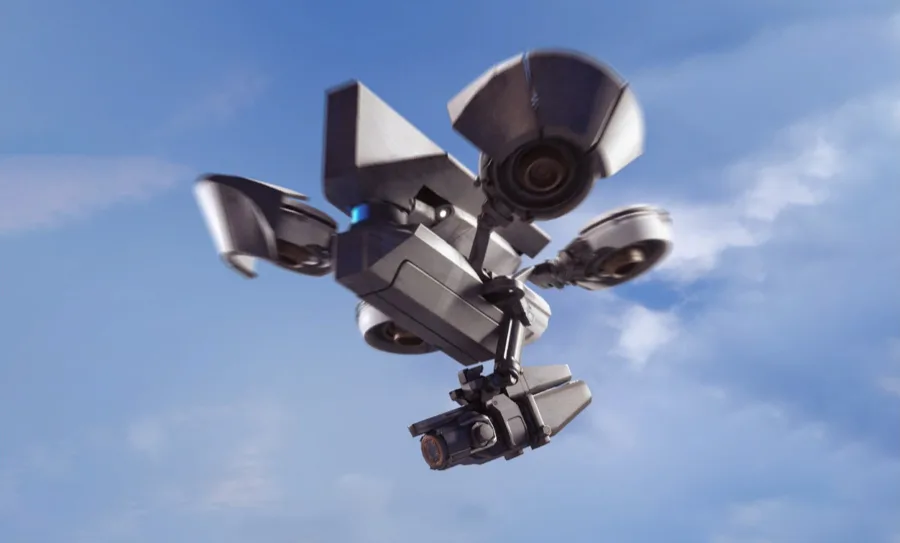
Hornet
smallA small armored support drone that flies with Wasp and Firefly patrols, locking raiders down with stun rounds so its swarm-mates can finish the job. The stun projectile is slow enough to dodge-roll with good timing. Medium or heavy ammo punches through its plating best, and aiming at the unarmored rear thrusters destabilizes it. Good source of Medium Ammo; its Hornet Driver drop upgrades the Gear Bench and doubles as a stun tool against bigger ARC.
- Health
- 200
- Weak points
- 1
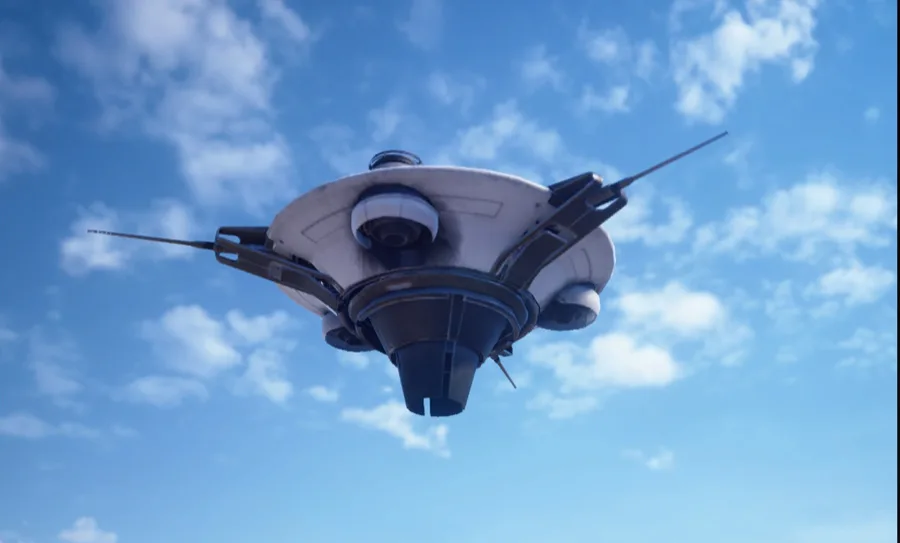
Snitch
smallAn unarmed reconnaissance drone that patrols with a wide, visible scanner beam. It never fights, but if it locks onto you it loudly broadcasts your position and begins a series of reinforcement calls — backup is guaranteed once its third call starts. Players either hide in dense foliage to avoid the beam or drop it fast with medium/heavy ammo; once its thrusters go, its flight turns erratic and hard to hit. Its Snitch Scanner drop feeds Utility Station upgrades.
- Health
- 158
- Weak points
- 1
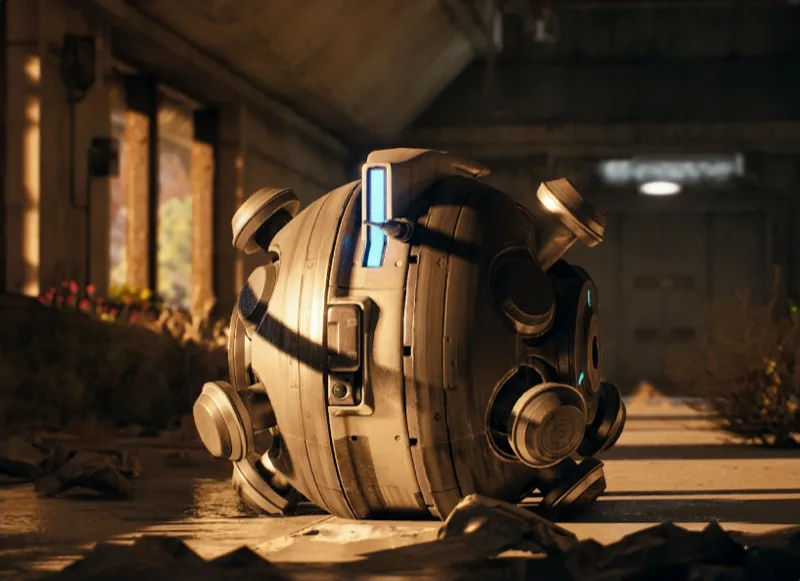
Comet
A heavier suicide-bomber cousin of the Pop, often escorting larger ARC. Added in Update 1.17.0 (Shrouded Sky); Update 1.26.0 removed it from standard Dam Battlegrounds sessions and reduced its Buried City presence. Two counters work: strip its armor with 2–3 Seeker Grenades without harming the igniter, or shoot the exposed center as it splits open mid-charge. Kill it cleanly and the core piece reliably yields the Comet Igniter; if it self-destructs, only the ring remains to search.
- Health
- 150
- Weak points
- 1
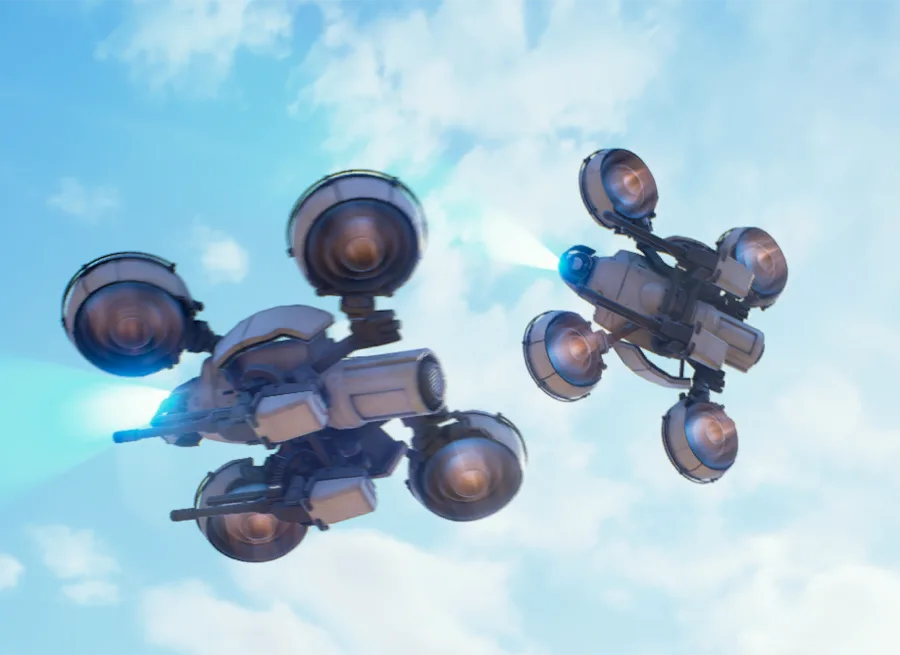
Wasp
smallThe bread-and-butter small flying drone, patrolling outdoor areas in swarms alongside Hornets and Fireflies. Its machine gun can chew through shields quickly, but its unarmored frame and exposed thrusters make it easy to destabilize. Destroyed Wasps are a reliable Light Ammo source, and a Lure Grenade buys escape time from persistent swarms. Drops the Wasp Driver used for Gunsmith upgrades.
- Health
- 110
- Weak points
- 1
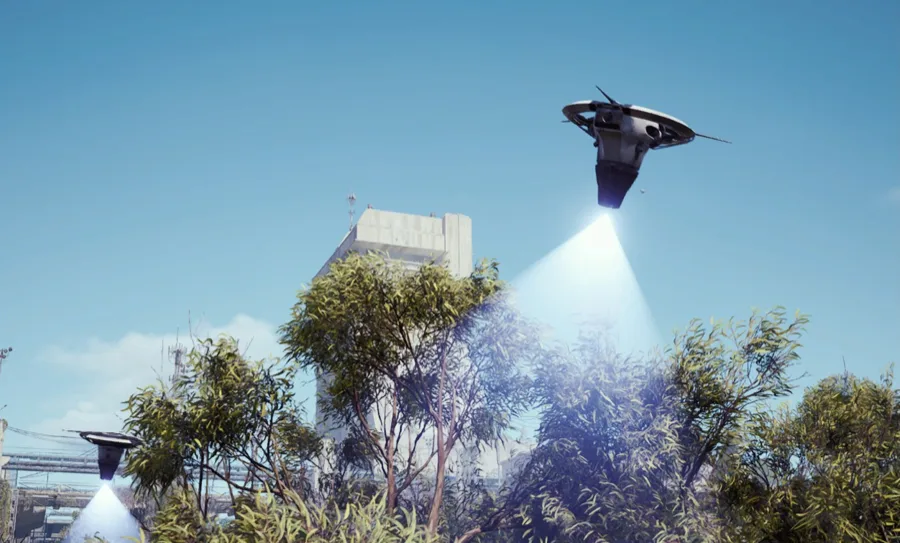
Spotter
smallA small flying forward-observer that operates in pairs escorting a Bombardier, feeding it real-time targeting data via a line-of-sight laser. Killing both blinds the Bombardier, but replacements respawn, so constantly clearing them wastes ammo — smarter counters are breaking the laser's line of sight, getting inside buildings the mortars can't reach, or using quick-use items to blind it. Seeker Grenades are noted as the most efficient removal tool. When its Bombardier dies, surviving Spotters fly away.
- Health
- 80
- Weak points
- 1
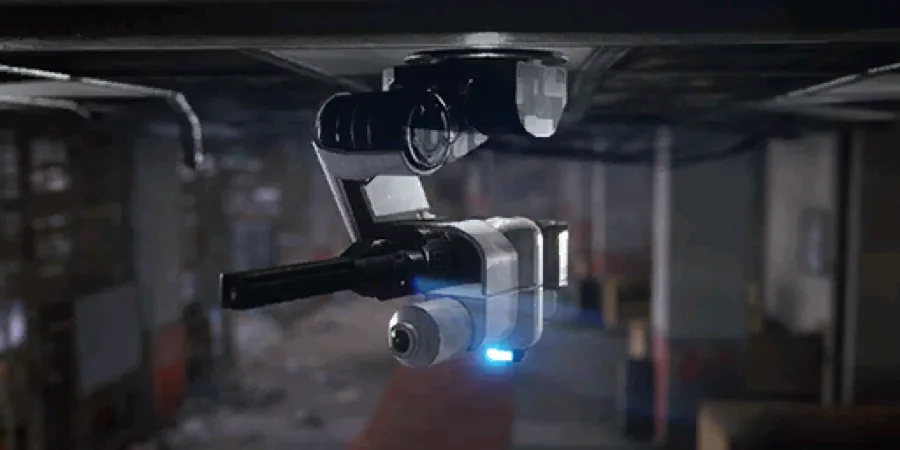
Turret
A crude stationary gun emplacement found inside buildings across the Rust Belt. Its sweeping scanner emits visible light, so attentive raiders can simply route around it, and with no armor it folds to a few rounds of any ammo type. The wiki suggests baiting its fire from cover, or two heavy ammo shots to delete it.
- Health
- 80
- Weak points
- —
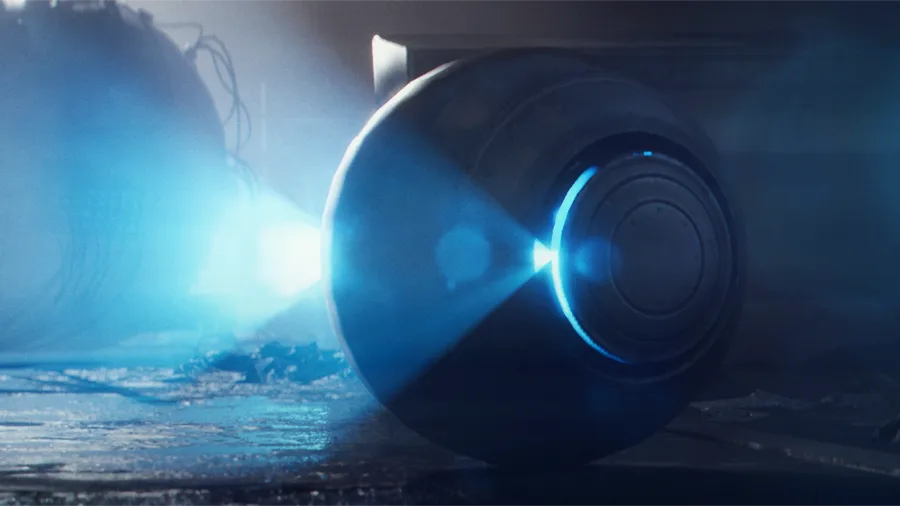
Fireball
smallA small armored sphere built for close-quarters arson, paired with Pops inside large indoor facilities — the wiki specifically notes the Buried City Metro entrances and Blue Gate's underground bunker; it rarely appears in the open world. Light ammo bounces off its closed shell, so either wait for the panel to open and shoot the core, or bring a hard-hitting weapon like a Ferro or Anvil. Give it space when it dies — it ignites the ground around it. Drops the Fireball Burner for Refiner upgrades.
- Health
- 20
- Weak points
- 1
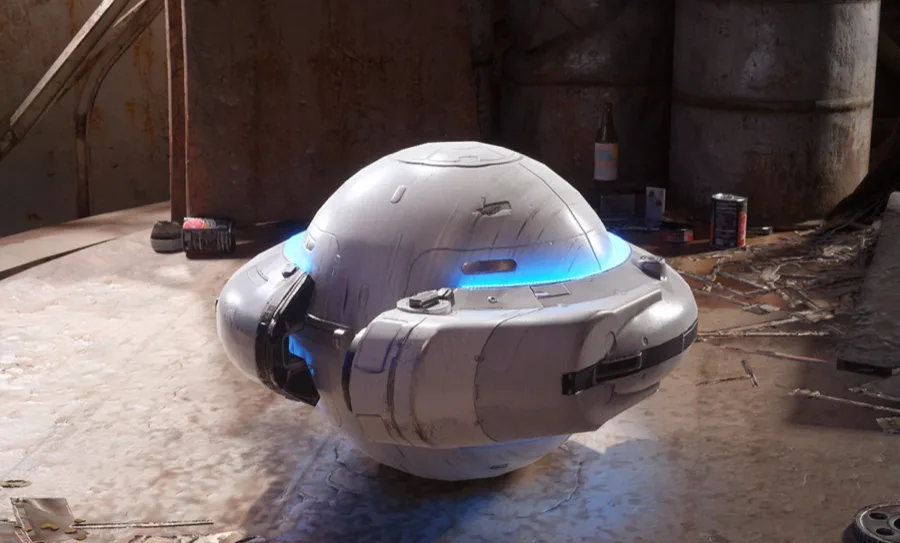
Pop
smallA rolling proximity bomb usually deployed indoors alongside Fireballs as area denial. Its accelerating beep is the countdown — a fast-firing weapon at close range or climbing out of its reach are the standard answers, since it generally can't jump or climb. Skilled players can dodge-roll over it to bait the detonation. Drops the Pop Trigger used to upgrade the Explosives Station.
- Health
- 20
- Weak points
- —
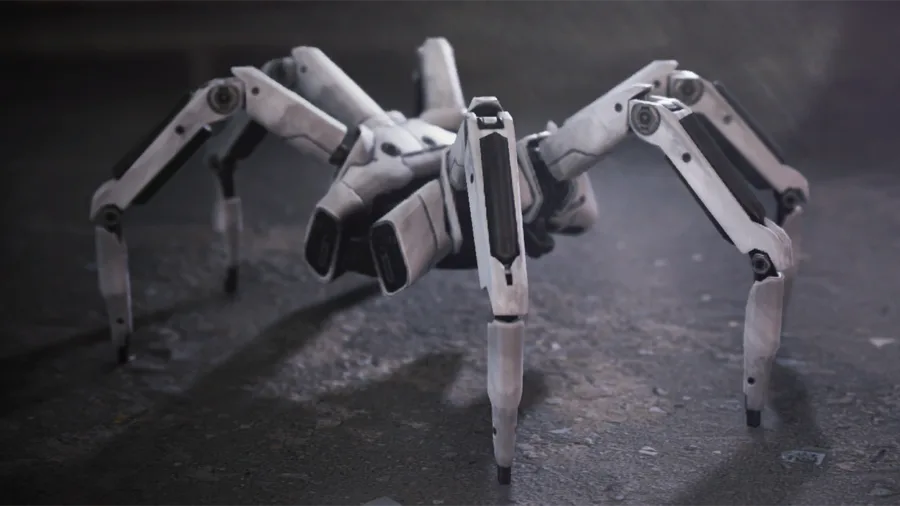
Tick
smallA tiny spider-like machine that lurks dormant on ceilings and rafters, usually heard scuttling before it's seen. When it latches onto a raider it drains health until removed with the interact key, then scurries off and may lunge again. It dies to a single Raider Tool melee hit, so experienced players never waste ammo on it. Drops the Tick Pod used for Medical Lab upgrades.
- Health
- 10
- Weak points
- —
Matriarch
colossalA colossal ARC larger than the Queen, appearing only while its namesake map condition is active (rotating through Dam Battlegrounds, Spaceport and The Blue Gate). Unlike the Queen it actively summons layered ARC reinforcements, making open-field fights nearly impossible — fight from hard cover and elevation where its children can't reach you (Spaceport's Control Tower A6 and Launch Towers, the Dam's Electrical Substation, atop Blue Gate's Reinforced Reception). Only the missile barrage truly hurts; hold fire during its energy shield or slip inside it to hit the exposed core. Introduced in Update 1.2.0 (North Line); drops the legendary Matriarch Reactor.
- Health
- —
- Weak points
- 2
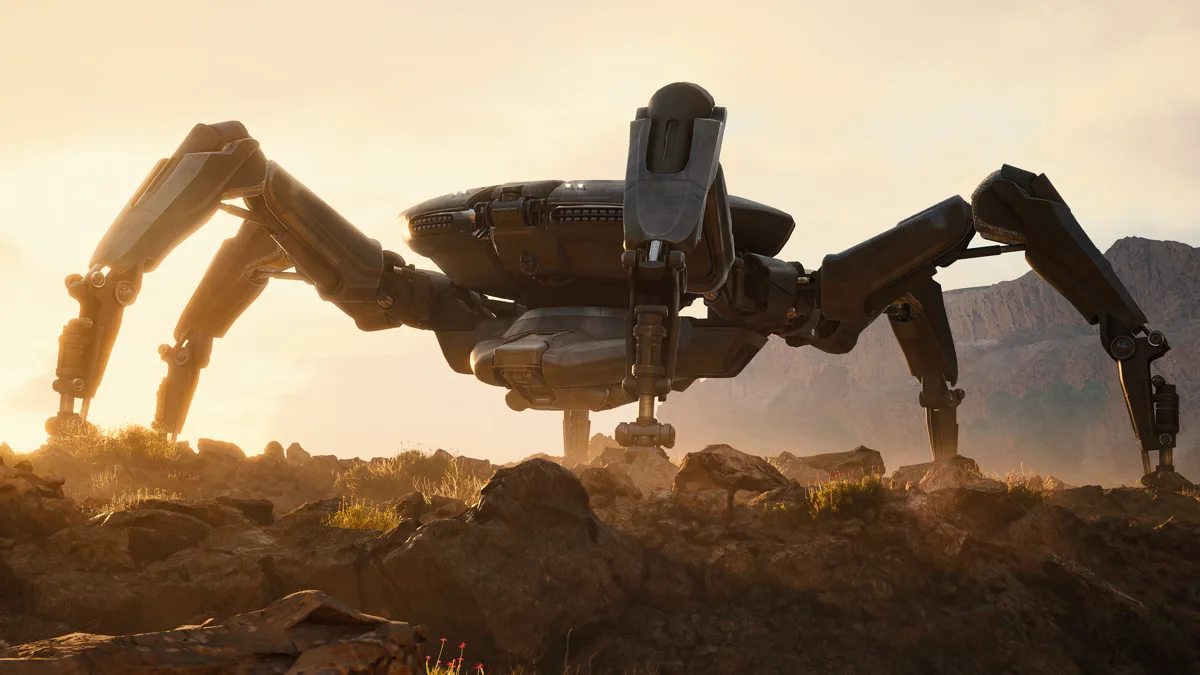
Queen
One of the largest and most dangerous ARC machines known, found only guarding a Harvester while the Harvester map condition is active (the condition rotates through Dam Battlegrounds, Spaceport and The Blue Gate). The fight is a plate-stripping race: break the armor faceplates to expose the glowing red core, work the yellow leg joints, and drop Deadline mines on its head or the exposed core. Destroying one grants the game's top-tier XP reward and a shot at the legendary Queen Reactor.
- Health
- —
- Weak points
- 2